Nash Push/Fold
What Nash Push/Fold Means
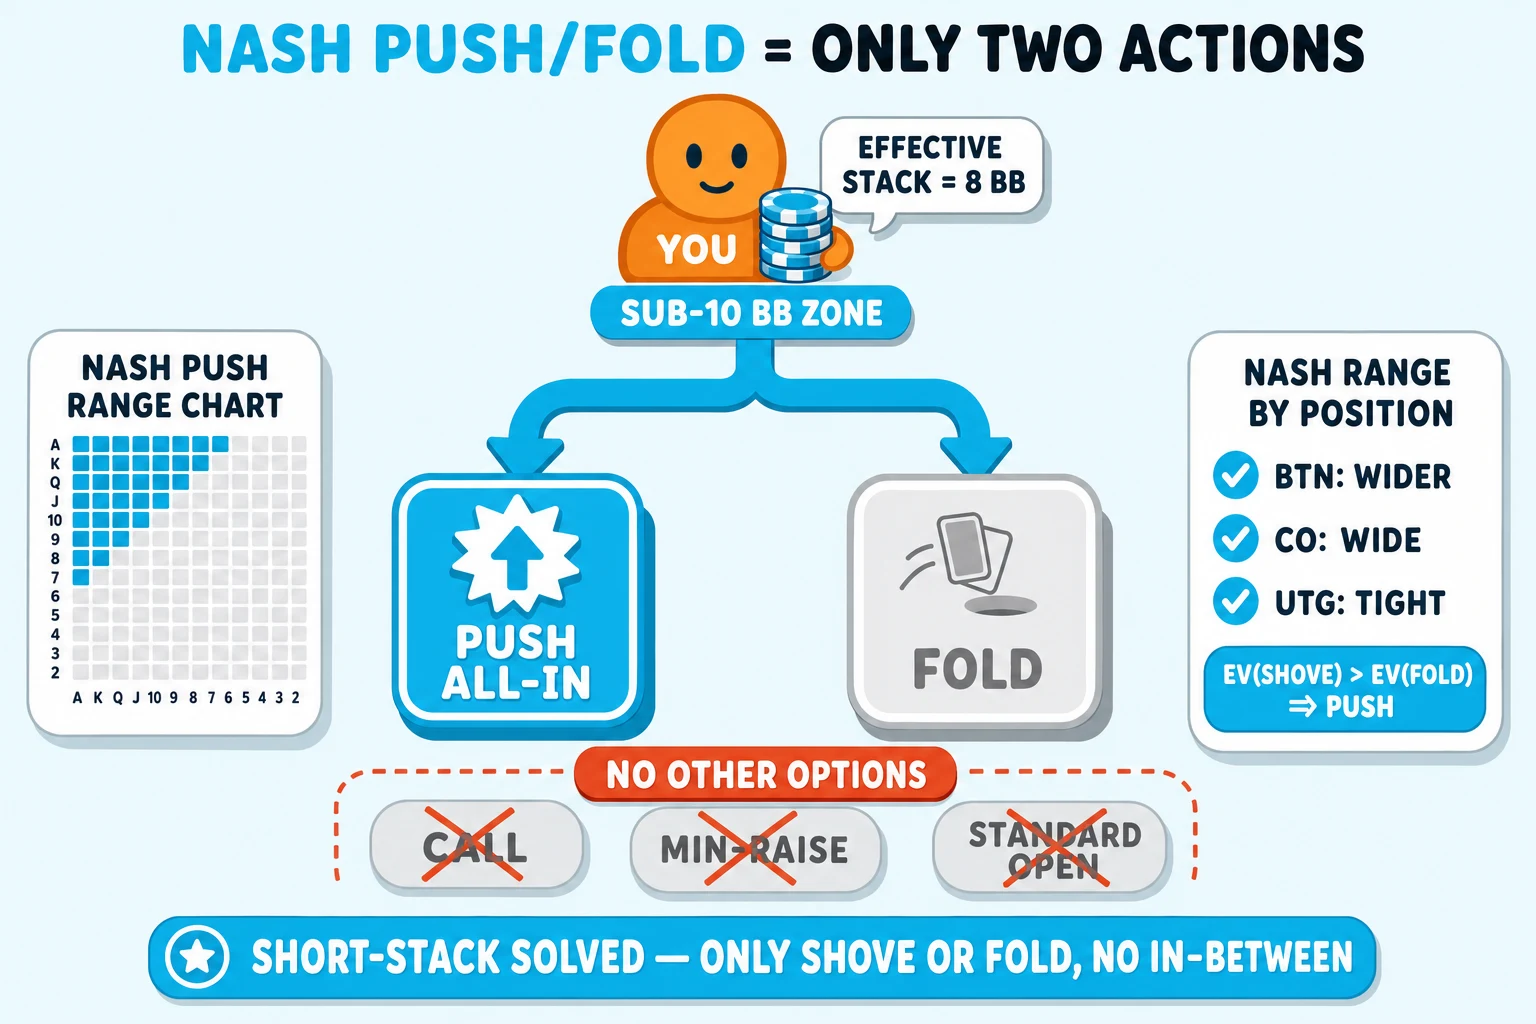
Nash Push/Fold simplifies short-stack preflop decisions in No-Limit Texas Hold’em by reducing options to two actions. Instead of navigating open-raises, calls, and post-flop play, you either shove all-in or fold. The method uses equilibrium-based ranges that depend on stack size, table position, and hand strength. Those ranges maximize expected value when post-flop play is effectively off the table because stacks are short. The approach assumes predictable opponent responses and replaces nuanced post-flop adjustments with preflop range math.
When to Use Nash Push/Fold (stack sizes & position)
Push/fold works best with short stacks, typically around ten big blinds or fewer. At that depth, the fold-or-shove decision captures almost all relevant expected value. Position matters: later seats like the button and cutoff can shove wider ranges. The small blind often shoves most widely in heads-up spots because only one opponent remains. More players to act generally require tighter shove ranges, and effective stacks adjust those thresholds.
How to Read and Use Push/Fold Charts
Charts show which hands are profitable to shove or call for each position and stack depth. Use them as quick-reference guides during short-stack situations at the table regularly.
- Identify effective stack in big blinds and note your seat (UTG, button, small blind, etc.).
- Find the chart for that stack depth and position to see your shove range. Charts are position-specific-always use the row or column that matches your situation.
- Facing a shove, consult the defending (calling) range for your position and stack depth to check profitability.
Use charts at the table to speed decisions, not as rigid rules once stacks deepen. They remove guesswork in high-pressure, sub-10 BB spots and help prevent simple mistakes.
Tools and Solvers for Generating Ranges
Modern solvers and dedicated push/fold apps generate equilibrium push and call ranges for every hand, position, and stack size. Use these tools to study and create memory aids, focusing on common stack depths. Export concise charts, drill short scenarios, and validate marginal shove or call spots during practice.
Practical Execution in Tournament Play
In tournament spots under ~10 BB, simplify decisions to shove or fold guided by charted ranges.
- Count your effective stack in big blinds and note your table position.
- Check your memorized shove threshold for that seat or glance at a chart during breaks.
- Shove when your hand falls inside the charted range; fold when it does not.
If facing a shove, compare the opponent’s range and your defending chart before calling. Combine chart guidance with live reads like opponent tendencies, antes, and payout dynamics. Remember charts reflect equilibrium play; deviate only when you have a clear exploitative read.
Advantages and Limitations of Push/Fold
Advantages: Push/fold is simple to memorize, reduces mistakes under pressure, and prevents post-flop errors with short stacks. This approach especially helps less-experienced players manage decisions in late-stage tournament play.
Limitations: As stacks deepen, the EV cost of a push/fold-only strategy grows. Smaller raises, calls, and post-flop play become profitable, so strict push/fold can lose chips. Charts assume equilibrium opponents; against exploitable players, intentional deviations can yield higher EV.
Quick checklist
- Always know your effective stack in big blinds before making each decision at the table.
- Use position-specific push/fold ranges when deciding whether to shove or to defend.
- Use solvers and apps to build, export, and practice concise charted ranges.
- Memorize common shove thresholds for the blinds and the button in typical stack depths.
- Transition away from push/fold as stacks grow and post-flop play becomes viable.